How to Paint a Fence
A fresh coat of paint can update a weather-worn fence or beautify a new one. Since a fence can be a major aspect of your home's exterior, you need to know the steps to properly paint a fence.


Painting a fence is a DIY project anyone can complete once you know what supplies and steps are needed to make it a success. Whether your fence is vinyl or metal, we’ve got you covered with our step-by-step guide on how to paint a fence.
Which Paint Product Is Right for Your Fence?
Before starting any project, it’s important to determine what products you need to achieve the desired result. When painting a fence, selecting the appropriate paint is essential.
Here’s what to consider before taking out your brushes.
Painting Metal Fences
If your fence is metal, we recommend priming with Ultra Spec® HP Acrylic Metal Primer, which offers excellent adhesion and acts as a rust inhibitor to keep your fence in good shape.After priming, paint your metal fence with Ultra Spec® HP D.T.M. Acrylic Enamel. This fast-drying, easy-to-apply paint comes in three sheens: low lustre, semi-gloss, and gloss.
Painting Vinyl Fences
When painting a vinyl fence, it is important to use a powerful priming product. Insl-X® Stix® Waterborne Bonding Primer ensures that paint adheres properly to almost any surface, including vinyl.
We recommend painting your vinyl fence with Regal® Select Exterior Paint. It offers a durable finish that resists fading, cracking, and peeling so every job looks freshly painted for years.
It is important not to paint vinyl with any color darker than the original color. Benjamin Moore offers a collection of colors formulated specifically for vinyl surfaces. To find the perfect paint color for your fence, browse our vinyl-safe color palette.
Can I Paint a Wood Fence?
Painting a wood fence can be done, although we recommend using an exterior stain.
Staining wood often requires some prep work. You will also need to consider the type of wood and its condition, as well as how much of the natural grain you want to show through.
Woodluxe® is an innovative line of oil- and water-based exterior stains that set your job up for success. If you want to learn how to stain your fence, follow our step-by-step guide.
How to Paint a Fence
Step 1: Check the Weather Forecast Before Starting Your Fence Project
The optimal temperature for exterior painting is between 35℉ and 100℉ with low humidity, although the temperature range varies by product. Rain-free days are best for painting a fence. If the forecast is dry for at least 36 hours, you’re in prime painting weather!
Refer to the instructions on your paint can or the Technical Data Sheet for the recommended outdoor temperatures and dry times of the products you are using.
Step 2: Clear and Prep the Area Around Your Fence
Before you start painting, take measures to avoid spreading or splattering paint onto surfaces you want to protect.
Any outdoor furniture near the fence should be moved away. Grass near the fence should be trimmed to make the painting process easier. Cover the sidewalk and nearby shrubs or flowers with a tarp to protect them from paint drops or spatter. If your fence touches your home’s exterior, apply painter’s tape to the house to create a protective barrier. Otherwise, use plastic sheeting to cover your home’s exterior near the fence.
Step 3: Prep Your Fence for Painting
Prepping a vinyl fence for painting is simple: Make sure the vinyl is clean, dry, and in sturdy condition before priming.
To prep a metal fence, power wash the fence or use a damp cloth and wire brush to ensure the fence is clean and dry before starting to prime.
Step 4: Prime Your Fence
Use a paintbrush or roller to apply an even coat of primer to your fence. Be sure to use the best primer for your fence material as noted in the checklist above.
Step 5: Paint Your Fence
You may opt to spray your fence, which is faster and more efficient than doing it by hand.
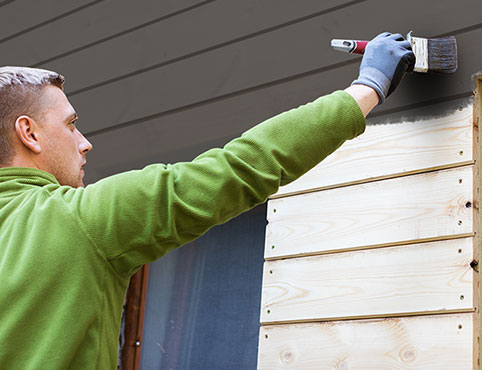
If you go the manual route, use a paintbrush or roller to apply an even coat of paint to your fence. Start at the top of the fence and work your way down. Paint horizontal panels with horizontal strokes, and vertical panels with vertical strokes.
Step 6: Let Your Fence Paint Dry Before Applying the Second Coat of Paint
Once the first coat of paint is dry, repeat painting with a second coat. Allow the paint to cure completely before reinstalling any hardware.
Read the primer and paint instructions carefully, as dry time (how long you need to wait before applying the next coat) and cure time (how long you should wait before returning your fence to everyday use) may vary. You can find dry and cure times on the paint can or the product’s Technical Data Sheet.
Now that you’ve mastered painting an outdoor fence, try staining a deck or staining outdoor furniture for your next project. Visit your locally owned Benjamin Moore® store for help with all your painting needs. Find more tips on our how-to page.
Feeling overwhelmed? Consider hiring a professional painting contractor.
Frequently Asked Questions
Q. Is painting a fence a good idea?
A. Painting a fence can update a weather-worn fence or beautify a new one. With the right paint, you can elevate your property’s curb appeal, enhance your home’s exterior color combination, and offer protection to the painted surface against environmental factors such as UV light and wind-driven rain.
Selecting the right color and products is essential when painting a fence.
Q. What kind of paint do you use on a fence?
A. The type of paint you use on a fence depends on the kind of fence you’re painting.
If your fence is metal, we recommend priming with Ultra Spec® HP Acrylic Metal Primer, which offers excellent adhesion and acts as a rust inhibitor to keep your fence in good shape.
To paint a metal fence, go with Ultra Spec® HP D.T.M Acrylic Enamel, a fast-drying, easy-to-apply paint that comes in three sheens: low lustre, semi-gloss, and gloss.
For a vinyl fence, it is important to use a powerful priming product. Insl-X® Stix® Waterborne Bonding Primer ensures that paint adheres properly to almost any surface, including vinyl.
We recommend painting your vinyl fence with Regal® Select Exterior Paint. It offers a durable finish that resists fading, cracking, and peeling so every job looks freshly painted for years.
Q. Do you need to prep a fence before painting?
A. Yes, it’s important to prep your fence before painting. However, the preparation process depends on the material of your fence.
Prepping a vinyl fence for painting is simple: Make sure the vinyl is clean, dry, and in sturdy condition before priming.
To prep a metal fence, power wash the fence or use a damp cloth and wire brush to ensure the fence is clean and dry before starting to prime.
To prime your fence, use a paintbrush or roller to apply an even coat of primer. Be sure to use the best primer for your fence material.
Q. What is the best color to paint a fence?
A. Choosing the best paint color for your fence depends on several factors, including your home’s natural surroundings, any neighboring color schemes, exterior color trends, and your personal preference.
For the best paint color ideas, browse our vinyl-safe color palette.
Q. What is the best way to paint a fence?
A. You should apply at least two coats of paint to your fence. There are a couple of ways to do this.
You may opt to spray the fence, which is faster and more efficient than doing it by hand.
If you go the manual route, use a paintbrush or roller to apply an even coat of paint to your fence. Start at the top of the fence and work your way down. Make sure you paint horizontal panels with horizontal strokes, and vertical panels with vertical strokes.


