How to Paint Interior Walls in Any Room
Are your walls ready for a repaint? Our tips for painting walls can help you transform your entire space.


When painting a room, several steps will set your project up for success, from making a plan and gathering materials to painting the ceiling and trim. When you’re ready to paint the walls, using the right tools, techniques, and paint will quickly transform you from a beginner into a confident DIYer. The best paints for interior walls will cover properly prepared surfaces in fewer coats. However, beware of bargain paints that claim to have good coverage at too-good-to-be-true prices.
Benjamin Moore premium products are powered by patented Gennex® Color Technology, ensuring you’ll enjoy gorgeous paint colors and unsurpassed durability every time.
The Best Way to Paint Walls
When it comes to home interiors, there really is no “fast and easy” way to paint walls. To ensure your painting project is a success, properly prepare the surface and take your time. Remember to read all labels and follow the instructions carefully. Before starting your project, be sure to consult the safety data sheets for the Benjamin Moore products you are using and follow the precautions.
Painting walls does not need to be difficult. Our How to Paint Interior Walls video not only shows you how to paint a room but also provides interior painting tips that will help you achieve excellent results.
This video will teach you proper painting techniques, the types of paint rollers to use, how to load paint onto a roller, and everything you need to know to properly paint a room.
Supplies Checklist


Step 1: Select the Right Tools for Painting Interior Walls
The right tools are important for any job. To properly paint an interior wall, you will need a high-quality roller sleeve and handle that are best suited for the job. A 3/8-inch sleeve works for most finishes, while a 1/4-inch sleeve is best for glossy finishes, and a thicker 1/2- or 3/4-inch sleeve is ideal for rough, textured walls.
Wash and dry the roller sleeves to remove any loose fibers prior to painting walls.
You’ll also need quality paint such as premium Aura® Interior; Regal® Select Interior, a favorite of homeowners and painting professionals; or Ben® Interior, a paint formulated specifically to help DIYers with quick-fix drips and smooth touch-ups.

Step 2: Prepare the Wall Surface and Work Area
Preparing the walls of the room is always critical to a successful paint job, starting with cleaning.
Most walls can be washed using a sponge and warm water. If mildew is present, be sure to remove it completely. Priming is also essential; be sure to ask your local Benjamin Moore store for a deep base primer if painting a darker hue.
In addition, be sure to prepare the room for painting. Use drop cloths to cover the floors and any items you want to protect from paint spatter. Tape off the borders of walls you want to avoid spreading paint on.

Step 3: Cut In the Room
When you paint a room, you have to “cut in” with a 2½-inch angle sash brush. Cutting in with a paintbrush means painting along the ceiling line, corners, windows, doors, molding, outlets, and switches prior to using a roller.
See our How to Cut In a Room When Painting video to learn more.

Step 4: Load Your Roller with Interior Paint
You cannot start painting your walls without prepping your roller for the job ahead. There are a few things you must do first to be efficient and avoid making a mess.
Place a liner in your paint tray and carefully pour paint into the tray. Begin loading your roller by rolling it along the raised roll-off area of the pan. Touch the paint but do so without completely immersing the sleeve. Repeat this motion until the roller is saturated.

Step 5: Start Rolling
Start each section by rolling from the top down, overlapping each row by about 3 to 5 inches. Apply only light pressure, letting the roller and the paint do the work. If you press too hard, you may create drips and runs.

Step 6: Reload Your Roller with Paint
Every time you reload the roller, begin a new row on an unpainted area and work back into the previously painted row. Your extension pole should be long enough that you can reach the highest and lowest points of the wall comfortably.
Painting streak-free walls is an important technique to master. For starters, don’t attempt to paint too large a space at one time. Painting areas of manageable size will help you maintain a “wet edge”, the application of paint toward the unpainted area and then back into the just-painted surface, which will ultimately produce a smooth, uniform appearance and help prevent lap marks.
Step 7: Let the Interior Wall Paint Dry, Then Recoat and Dry Again
Once every inch of your wall is covered in paint, let it dry thoroughly. We recommend applying at least two coats of your top coat product for optimal hide and color development.
Check the paint can for the recommended dry time and wait until the paint is completely dry before you add the second coat. Be sure to allow proper cure time before returning fixtures, wall plates, or frames to the walls. Refer to each product’s technical data sheet for more information.
Tips for Painting a Wall That Take Your Project to Another Level
Elevate your wall painting project by adding eye-catching details:
- How to Paint Wainscoting: Follow our step-by-step guide to painting wainscoting to add a classic design element to your walls.
- How to Paint Stripes on a Wall: Painting walls with stripes adds a creative dynamic to any room.
- How to Color Wash a Wall: A technique known as color washing or glaze painting can bring an inviting look and feel to any room.
Have More Questions? Visit your locally owned Benjamin Moore store or contact customer support.
Frequently Asked Questions
Q. Do you paint an interior wall from left to right or top to bottom?
A. It doesn’t necessarily matter if you paint an interior wall from left to right or top to bottom. That depends on your preference.
The outer portion of the wall should be painted before you move to the center. Ideally, you should work inward toward the center rather than painting in a single direction.
Q. What part of the wall should I paint first?
A. When painting walls, it is best to “cut in” along the perimeters of the wall before filling the center with paint. This process requires using a paintbrush to apply paint along the ceiling line, corners, windows, doors, molding, outlets, and switches.
After you do this, use a roller on the remaining portion of the wall.
Q. Do I need to prime already-painted walls?
A. Yes, it is best to prime walls that are already painted. Primer disguises imperfections, creates a smooth surface for your paint to lock onto, and ensures a uniform finish no matter what you’re painting.
Benjamin Moore’s Fresh Start® line of premium primers offers products that provide excellent hide on nearly any surface, even for projects with a significant color change.
Q. Is there a technique to painting walls?
A. Yes, there is a technique you can use to paint walls effectively.
After cleaning and priming the walls, “cut in” with a 2½-inch angle sash brush. Cutting in with a paintbrush means painting along the ceiling line, corners, windows, doors, molding, outlets, and switches prior to using a roller.
After cutting in, finish painting your walls with a roller.
Q. Is it better to paint one wall at a time?
A. Whether you paint one wall at a time or not is up to you. Either way, we recommend “cutting in” your walls before painting the entire surface.
Cutting in with a paintbrush means painting along the ceiling line, corners, windows, doors, molding, outlets, and switches prior to using a roller.
This approach will help you avoid making mistakes when painting with a roller later on.
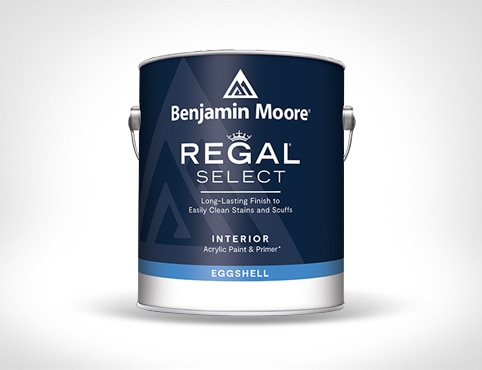
Regal® Select Interior Paint
Delivers excellent hide and coverage for a perfectly uniform finish, plus stain release technology that's easy to clean with less scrubbing.